
This automatic do it yourself chicken coop door is made from parts and pieces that can be easily obtained from Amazon or a local big box store. This daily chore is one that seems like it should be simple to automate, but I have been trying to build the perfect automatic chicken door for a decade now that is safe, reliable, and impenetrable.
My first iteration was a comical attempt at getting a used power car antenna to make a sliding door — It worked as a chicken door but was not reliable and couldn’t be checked on remotely. For years after that I would look at automatic chicken doors on amazon, but the cost was outside what I was willing to pay (~$300 at the time, $150 at time of writing). We had some children in this time, but they are quite a costly (but worth it) chicken coop operators as well.
A few years ago I started teaching Arduino (an easy to program piece of input/output hardware) at the school where I teach and it was so simple to automate anything and several guides online had the basic connections and programming. I even dreamed up and created an automatic chicken coop door that opened and closed with the sun! That one was really cool and worked quite well, but I wanted to improve a few things about its design . . . hence this simpler and cheaper DIY chicken coop door that doesn’t require any programming or fine adjustment.
What makes this DIY Chicken Coop Door better?
I can’t speak much to the automatic chicken doors on amazon. I actually thought I was getting a great deal once when I ordered one of these via a facebook ad for $40, but after a few months of waiting for the package to come from overseas, I received a fancy charging cable which they used to prove my “chicken door” had been delivered. Paypal was very kind and refunded my money in about 5 minutes. I wish people would be more honest.
If you avoid the “too good to be true deals” and cough up the near 200 dollars for the real version, I bet they would do a good job. BUT, there are a few things that I really like about the custom DIY chicken door I am going to show you how to build below. I’ll also let you know how I hooked it up in a different way beyond this simple method (I’m always improving I guess).
One BIG reason I don’t think the consumer door solutions would work for our coop is that we have a very big show quality rooster. He is big, beautiful, and incredibly friendly. He doesn’t like to squeeze through small doors and we don’t want him to get hurt. Doing it with the parts below would allow you to make a small door all the way up to closing or opening a standard size door for humans. The linear motors have plenty of power.
I alluded to the other reasons above — my wife and kids want to know their chickens are safe whether we are just in the living room, or hundreds of miles away on a camping trip. I’ll make sure to describe how we monitor and ensure this is a reliable, but strong against predators, setup.
Finally, as the days lengthen and shorten, or if the aforementioned predators start to come around early, it is great to be able to adjust the opening and closing times independent of the sun. We’ve recently had a bold fox stopping by in the early morning, so we’ve adjusted the door to hold the chickens in about an hour and a half beyond sunrise to keep them safe.
Automatic Chicken Coop Door (Version 3.0 in my case)
My wife and I like to make fun of recipe web pages that go through the chef’s entire life story before getting to the point, but here I am doing the exact thing! Anyway, lets get to it. . .
- Linear Actuator 6″ (only 5lbs force for safety)($80) OR Linear Actuator 12V 6″ (22-55 lbs force)
- ****See notes about Safety below.****
- Choose a 12″ model if you have a big door.
- Mechanical Timers x2 (Electric is more expensive, but might be better for you)
- Power Strip that can fit both the timers and the motor power supply — Make sure it can fit in your project box if you’re using one
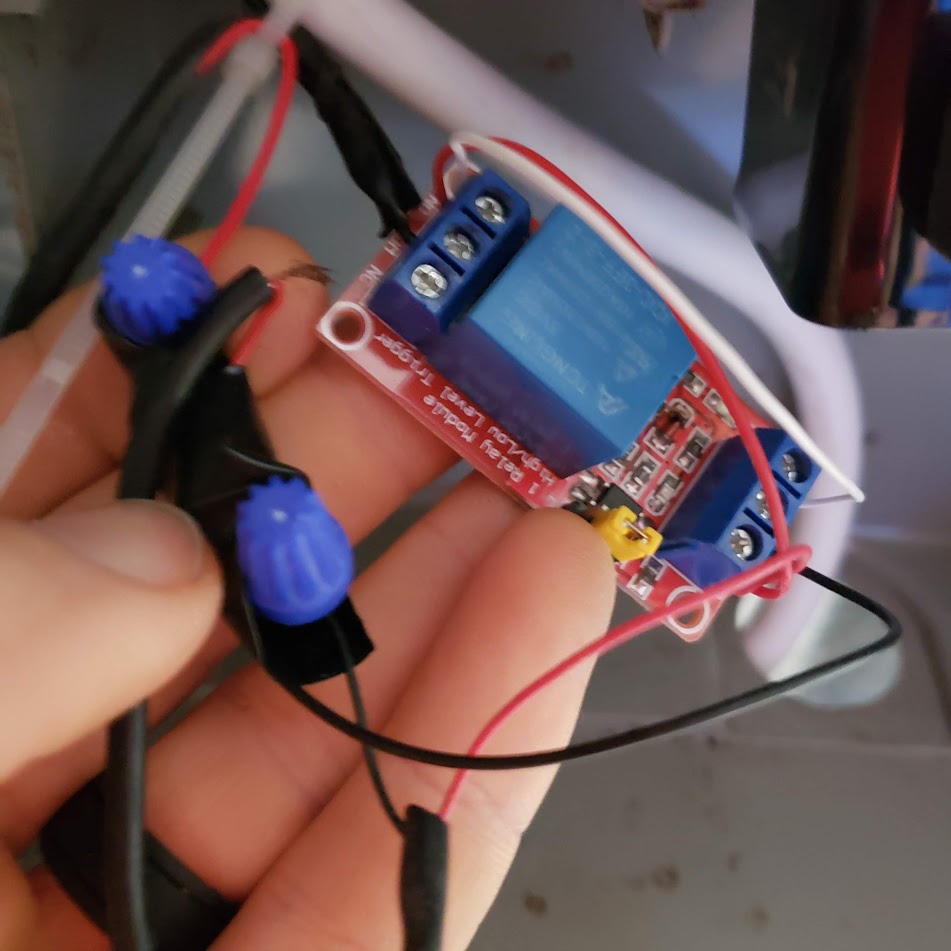
- 2x Individual Relay Blocks $7 for both (Must be the single versions)
- Power Supply x 3 – I love that these 12v adapters come with little terminal blocks, BUT Any old DC 5V to 12V power supply will work fine like from an old USB phone charger (2Amp or better) or any old power brick. I’m not the only one with a million of these laying around right???
- (Optional) An Electrical or sprinkler box to prevent timers from getting wet, dusty, dirty – I had a used sprinkler box
- (Optional) Strain Relief for exiting and entering wires
- (Optional) Wire Nuts – To connect motor wires without terminals
- (Optional) USB Cable if repurposing old phone power supplies
- Door
- Scrap Wood, piece of plywood, or existing door (see my other chicken door article for help with the frame and door)
- Hinge ($4) – Can be scrapped from old items easily.
Wiring of DIY Chicken Coop Door
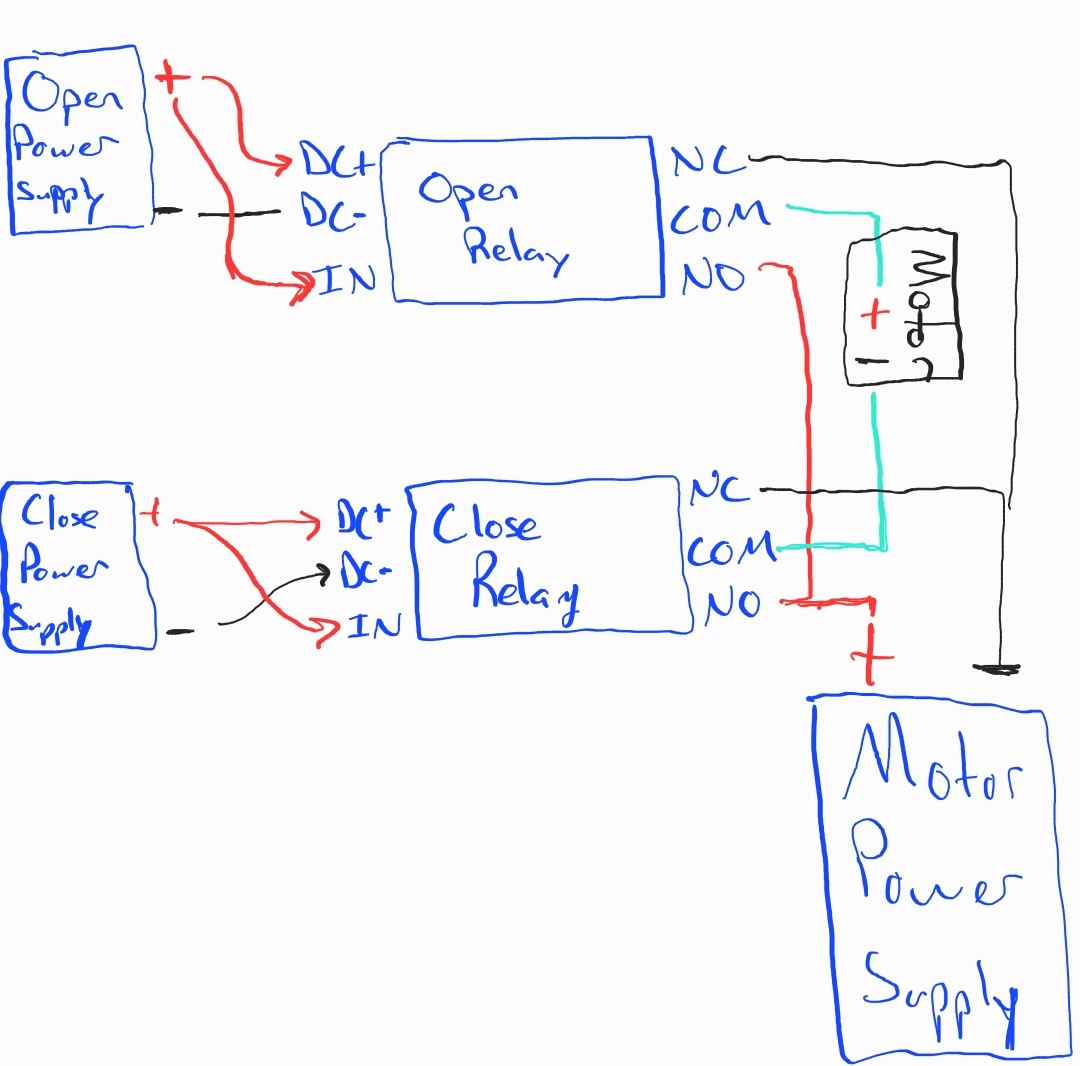
By using 3 power supplies, we isolate all the components and avoid any possible short circuiting. For more information about the theory behind reversing polarity to motors with relays, I recommend this great resource. With diodes to limit current flow to one direction, it is possible to use just two power supplies and two relays, but the setup seems unreliable because motor draw could cause the relay to not engage or disengage and/or it might short circuit with the other power supply — even if the timer is not on.
- First up, run your power strip cord out of your project box if you are using one (strain relief is good practice).
- Label one mechanical timer “Open” (paint pens) and the other “Close”. Plug in your mechanical timers to the OFF power strip for safety.
- Label one relay the “Open” relay and connect the positive (red wire if you’re using an old usb cable you’ve cut the end off of) to the DC+ and IN terminals. You can make what’s called a jumper between the two, aka, just get small piece of wire and put it in the same terminal you put the red wire then put the loose end of the jumper in the other connection.
- Connect the negative (black wire in cut USB cable from the power supply) to the DC- terminal of the “Open” relay.
- Repeat steps 4&5 for the “close” relay.
- Plug in your motor power supply.
- Wiring the motor
- If you’re using a USB power supply from a phone, cut your usb wire to access the red and black wires.
- Wire the red, positive, motor power supply wire to the BOTH NC terminals (use a jumper wire).
- Wire the black, negative, motor power supply wire to BOTH NO terminals (use a jumper wire).
- Wire one COM terminal to the Red motor wire. (Wire Nuts) (Strain Relief)
- Wire the other COM terminal to the Black motor wire. (Wire Nuts) (Strain Relief)
- IF your motor opens when it should close or vice versa – – SIMPLY reverse your COM wire.
- TEST
- Turn off timers, set their time to the current time and only put up one “notch” at the time you want it to open and close on the respective timers.
- Turn on the power strip. You can test the system or override the timing via the switches on the sides of the timer!! So one at a time, turn on the timers to check your wiring.
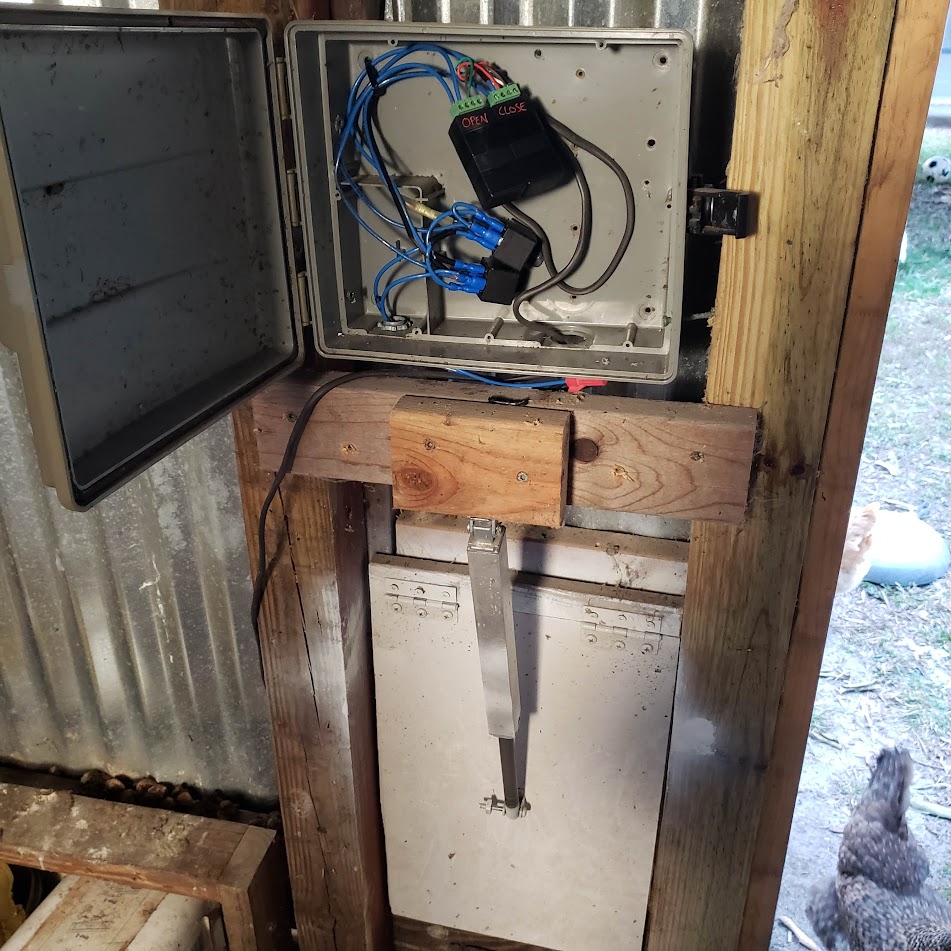
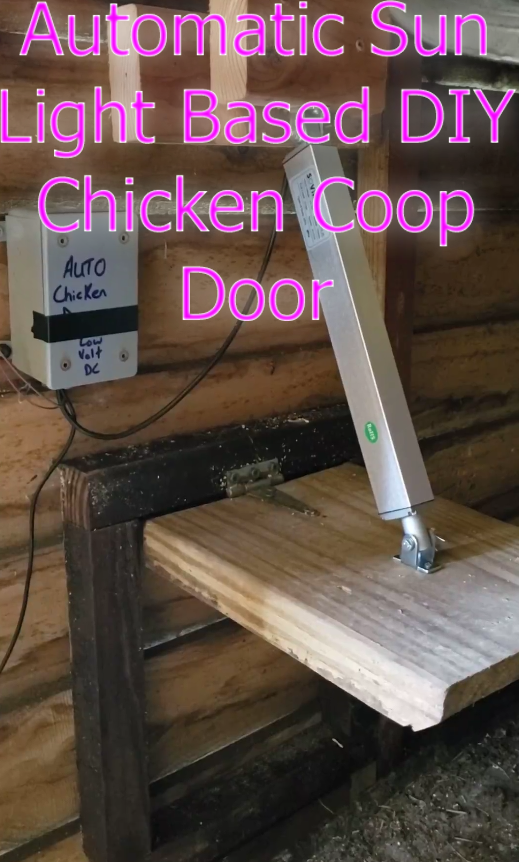
- Connection of motor to door – For more details visit, my other chicken door page. Really any door will do, I recommend atleast a 2×2 frame and 1/2 inch plywood “door”. Even the SAFE 5lb motor would have no problems lifting and closing such a door.
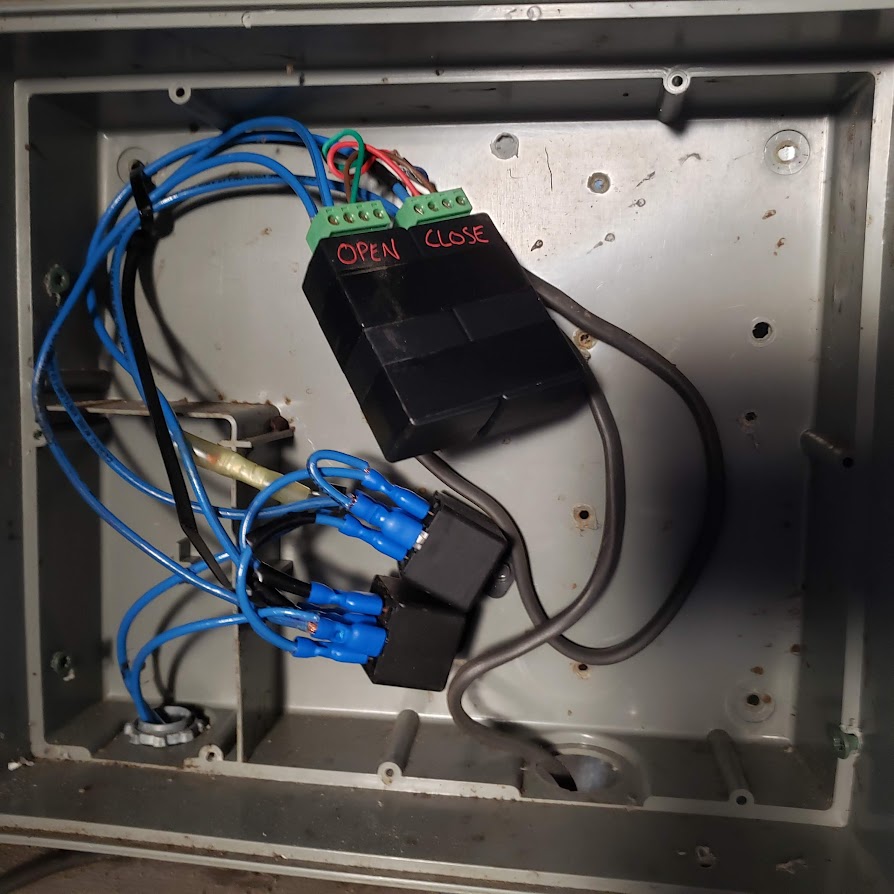
The photo below shows the wiring of the open power supply/relay, close power supply/relay, and their interconnection to the linear actuator (aka the motor)
If your testing went well, consider covering and/or reinforcing connections with some electrical tape. Double check that your timers are set correctly and enjoy!!
Safety and Tips for Coop Door
- Make the door “sill” (bottom) narrow and uncomfortable to roost on. This is for many reasons, older or sick chickens might block the door and prevent others from getting in.
- The cheap linear actuator I linked to above is very slow but could put enough force on a chicken (44 lbs) that they may suffocate. Even though these extend very slowly (60 seconds at 5 volts) and any person would likely get out of the way, a sleepy or sick chicken that is roosting in the way of the door could be hurt or killed. I highly recommend you buy a linear actuator with the lowest force possible or spring for a motor controller that can sense when an object is in the way.
- DC is generally quite safe, particularly below 30V, but the optional Electrical project box or sprinkler box could stop any sparking if you wired something very incorrectly or something more crazy like a lightning strike or a goat chews threw some wires.
- I’ve covered the safety precautions I can think of, but OBVIOUSLY, I have not seen your setup and I am unable to give you specific advice about your setup. If you doubt your project is safe in any way, please contact a professional to review your work or recommend safety changes!!
Chicken Coop 4.0
I’ll never stop DIYing better automatic chicken coop doors. The version I linked above worked great for approximately a year before I came up with a scheme to be able to remotely open and close the door from anywhere in the world using a system I already had in my house. If you want me to expand on any of these ideas, leave me a comment and ask!
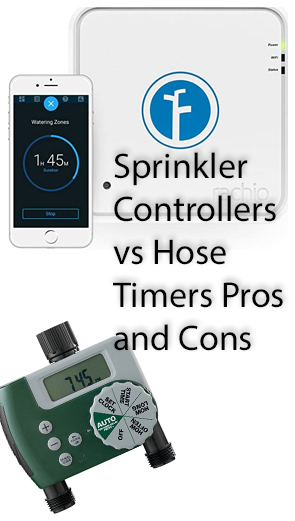
- Using a 24VAC to 12VDC Converter, I used my Rachio sprinkler timer to control the opening and closing of my automatic chicken coop door. This idea was so reliable, accessible, and logged, that I even run our cat superfeeder (over 3 weeks of food with the hopper) and twice daily water for dog, cat, ducks and chickens from the sprinkler timer. The app makes the functionality accessible form anywhere in the world, or my sofa. Another plus is that the sprinkler controller supplies all the power via the trenched and buried sprinkler wire.
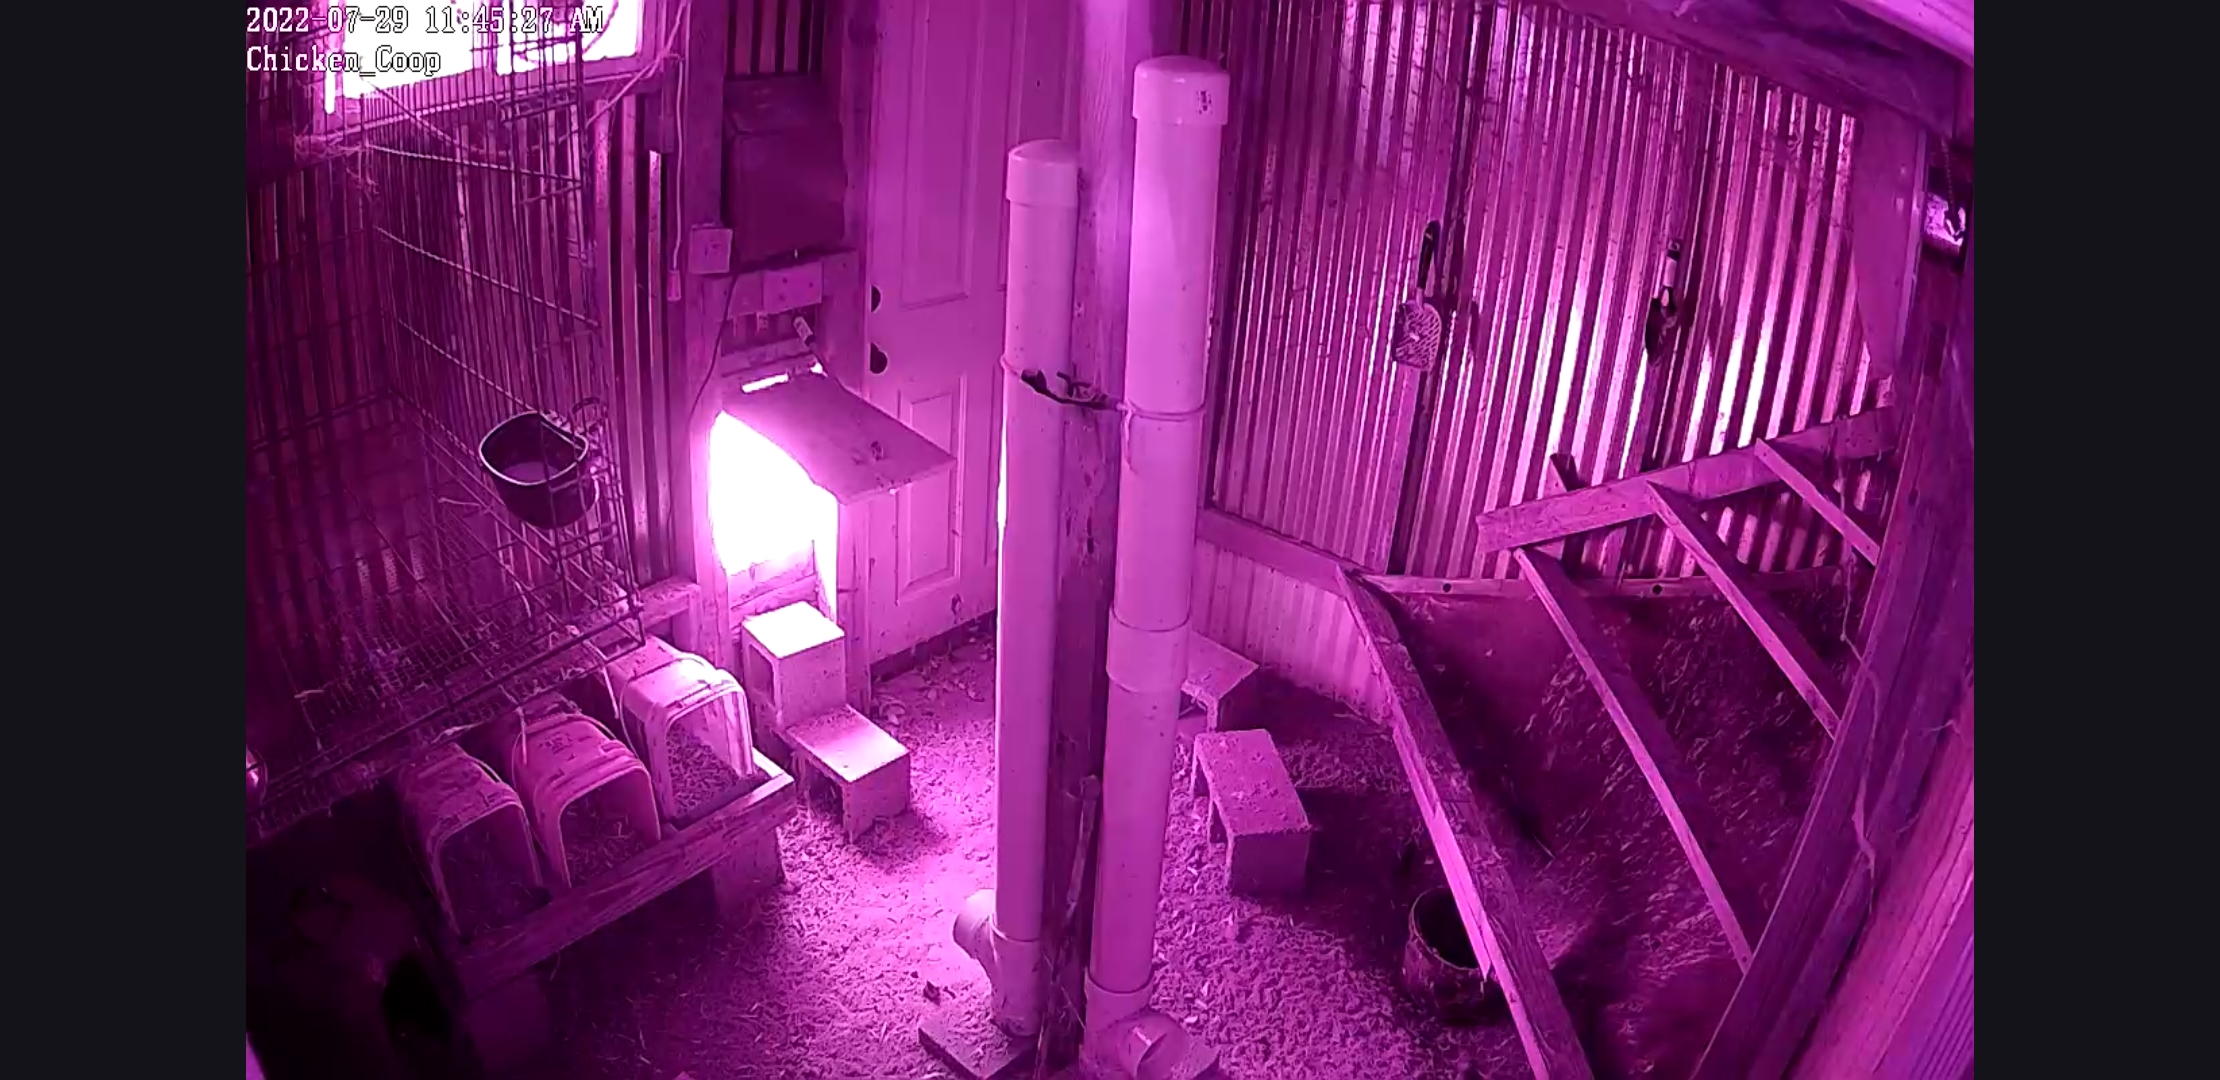
- Monitoring. There are really expensive outdoor cameras and cheap cameras that go out of business, die from the weather, or are full of security holes. Well, if you truly care about my recommendation, we’ve been buying these FOSCAM outdoor cameras. They aren’t sensational or overpriced, but for years they have been reliable, accessible from afar and continue to offer their new cameras at a fair price. They do not scam you into a monthly payment like so many try nowadays. They’re about $50, which is quite reasonable.
- ANYWAY – When we are away or if we are just being lazy, we like to pull up the live stream of the foscam outdoor camera of the coop and door to make sure everything is operating as it should. Indeed, chicken watching is a fun pastime in our family.
If you have any ideas or projects you’d like me to cover in more detail, Please leave a comment or message me @DrAllenRuppert on Instagram. I’d love to hear from you!


2 thoughts on “DIY Chicken Coop Door – Automatic, simple, cheap”
Can you explain the last photo you have on this page. What is the open close black thing and why the 2 Bosch style relays?
The black boxes are 24VAC to 12VDC converters. Cheap and relatively commonly used to power security camera systems. Or in this case, take the 24VAC signal from the Sprinkler controller and use it to power the door. I needed two and the relays to keep the signals isolated and to be able to reverse the 12VDC so the motor would work to close when one of the signals was activated and to open when the other signal was activated. By the way, this system has been working flawlessly for over a year. Thanks for reading!