
Want to build a good looking and long lasting welded wire farm fence? There are lots of different opinions on what is best or proper. There are many questions to answer when building a fence. What fence height? Which posts should I use? What type of fencing material? How much space between posts? I’m going to do my best to address each of the major points to help you build a proper fence.
Planning stage – Measurement
My welded wire farm fence is 161 ft long and includes a 12 ft drive gate. Posts should be 8 to 12 feet apart. The close together, the stronger but more expensive your fence will be. I went with 10 feet.
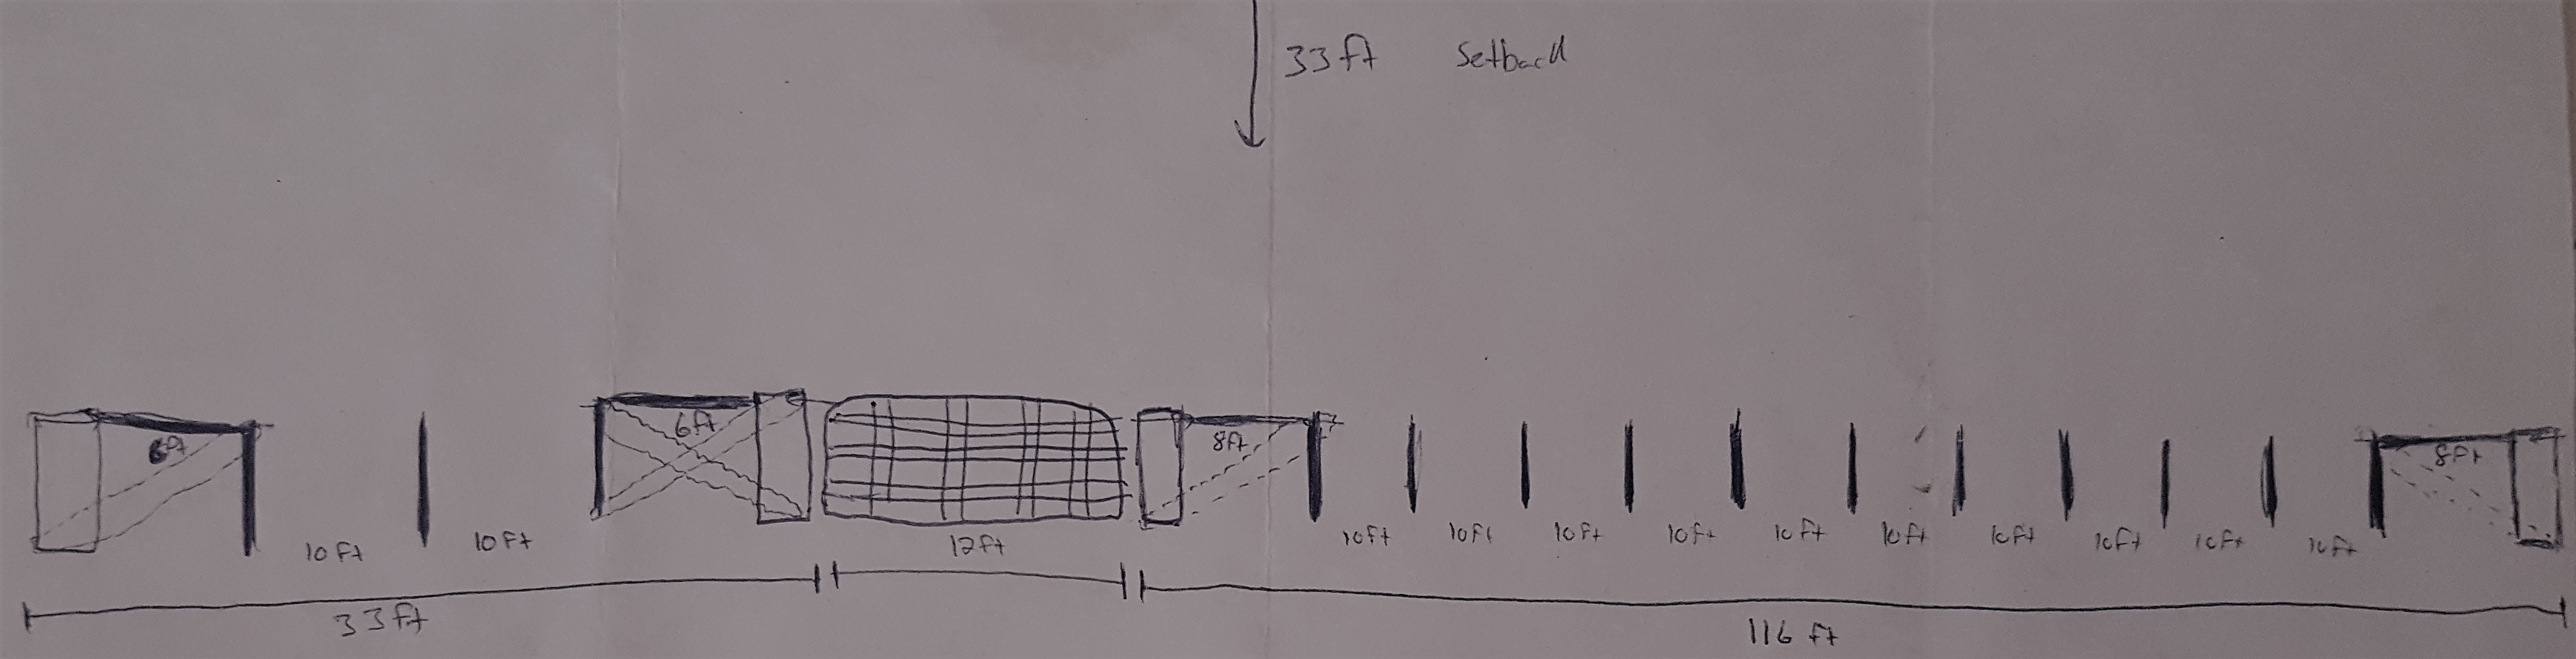
I divided 161 by 10 to calculate 16 posts total. Posts around gates and corners must be “beefier”. These larger posts also need a brace, so I won’t subtract them from our total. In the end, I bought 18 (Two extra, I hate going back to the store) ground contact pressure treated 8 ft 4×4’s and four 8 ft 6×6’s.
Welded wire farm fence usually comes in a maximum length of 100 ft. I bought one 100 ft roll and a 50 ft roll (I actually need only 149ft of fence because of the gate)
Depending on the size of your gate, you might end up with an extra post, but most supply stores will be happy to accept a return. If you are planning on having an automated gate, you should not go larger than 14ft. More on that and installing the gate here.
Other supplies needed include spike nails to support the braces. Quadruple your number of “beefy” posts to find your number of spike nails. Buy a 12″ long 3/8 inch drill bit to pre-drill for spikes, bracing wire to put tension on the braces, concrete (I only used on brace posts) and fencing staples.
Final thought. Do you need a permit? Our property is zoned agricultural but laws vary. Call or go in and ask to be sure!!! Our welded wire farm fence did not require a permit, but chain link would have. Be sure to ask if there is a minimum set back from the road. Your goal here is for the fence to last for decades, not get torn down in a month or two.
Supply List for 250ft Welded Wire Farm Fence
- 18- 4×4’s Pressure Treated Ground Contact 8 ft
- 4- 6×6’s Pressure Treated Ground Contact 8 ft
- 1- 100 ft Welded Wire Farm Fence (We used 5ft like here)
- 1- 50 ft Welded Wire Farm Fence
- 2- 10 pack Spike Nails 3/8″ by 10″ length
- 100 ft bracing wire (could use braided steel cabling)
- 12″ Long 3/8″ Drill bit for spike predrilling
- Fencing staples (better bought online)
- 6 80lb bags of concrete
- Tools you should have – Shovel, post hole digger, hammer, level, string, ratchet straps, hand saw
Optional Supplies
- 12 ft gate – We have fit a dump truck through our 12 ft gate without problem
- Fence stapler
- Fence puller
Installing Welded Wire Farm Fence
General guidelines
- All posts should be 3 ft into the ground if possible unless you are building a 6ft fence, then you have to do 2 ft and concrete for all posts, or get longer 4×4’s at great expense. If you can’t make it 3 ft, 2ft is acceptable, just add 40 pounds of concrete. You’ll cut off the higher parts of each post as the final step.
- Always backfill post holes then tamp the dirt or concrete down around the inside of the post. You can use a scrap 2×4 to compact the dirt or you can flip your shovel around and use the handle. Backfill and repeat tamping process about 4-6 times minimum per post. Check level between each tamping effort. This is a lot of work, but creates a very strong and unlikely to lean fence.
- Stay hydrated, wear safety equipment, ask for help.
Step 1 CORNER POSTS:
Set your “beefy” corner posts 3 ft into the ground by digging a hole. Tamp and fill the hole with an entire bag of concrete while leveling the post. Tamp and fill with dirt until the dirt is level again with the ground. One final check that your corner post is level.
Step 2 GUIDE STRING:
Tie a string around the base of both corner posts high enough to not get caught by the grass and tighten. Line it up with the front of the both posts. This string will help you create a straight fence.
Step 3 GATE POSTS:
Set your 6×6 or larger gate posts a gate width plus 4 inches apart. In my case I set the INSIDE EDGES of the posts 12 ft 4 inches apart. Tamp and back fill with concrete as in step 1. Also in this step, line up the front of the 6×6 with the string
Step 4 BRACE POSTS & BRACES:
The most debated step on the internet. Dig a hole for a regular post 8 feet from each of your corner and gate posts. Use another post to measure the distance as you will
be using it to span between the two posts. Level the new post in its hole. Drill a pilot hole for the spike nail through both posts and also into the horizontal brace post. Hammer a spike nail partially into the two posts and “mount” the horizontal bracing post. Hammer the spikes the remainder o the way but leave about 1 inch out to tie our bracing wire to. Make sure everything is level and fill brace post with concrete while tamping and obsessively checking level. Repeat brace construction (4 times in my case).
Step 5 BRACING WIRE:

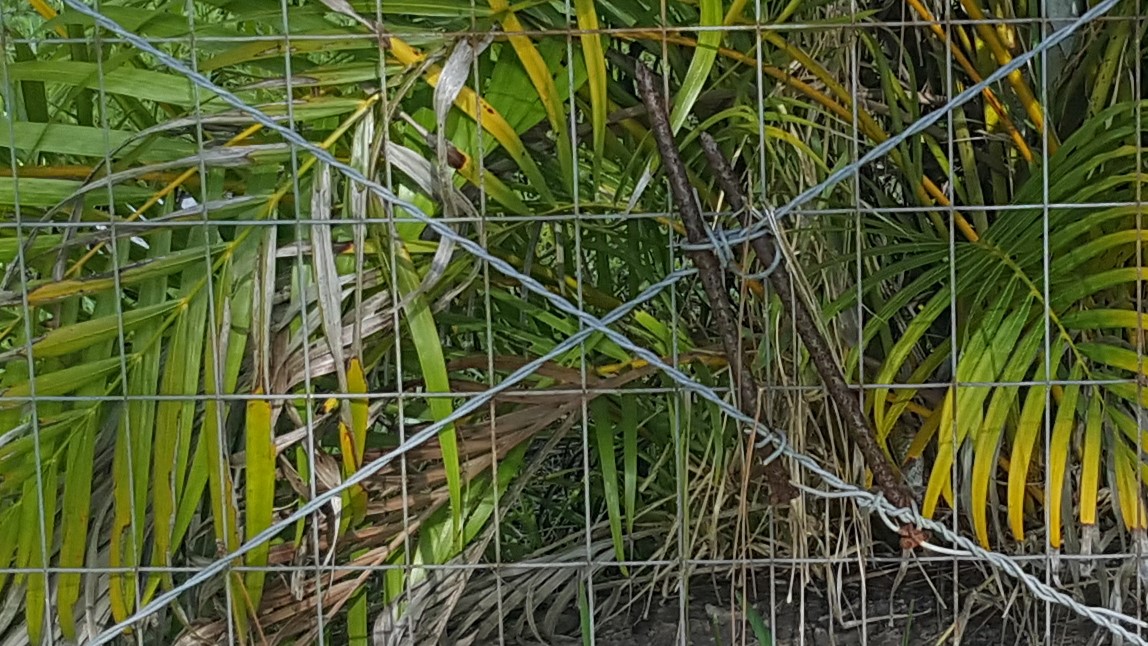
Use the bracing wire to diagonally brace. This is where high school physics comes in handy. For each corner or gate, you will brace diagonally from the base of the corner or gate post to the top of the brace post. Make a notch in the bottom of the wood and loop it through to the spike nail to tie it off. We will tension them later. For the gate post holding the gate, brace both diagonals to form an “X” because this post will be pulled in both directions.
Step 6 REGULAR POSTS:
Count the number of 4×4’s you have left. Measure the number of feet remaining for posts. Divide the remaining feet by the number of posts to get the distance you will space your posts. In my case, because I had extra posts, I measured and marked every 9′ 4″. Dig, level, and set by tamping your regular posts. Go 3 ft deep, concrete optional. DO NOT COVER POST IN TAR, DO NOT WORRY ABOUT ADDING GRAVEL. Your post is made for ground contact, tar will just trap the water. Do a great job tamping and don’t worry.
Step 7 HANGING WELDED WIRE:
Wrap fence around side of corner post (90 degrees around the corner. This will make it pull more on the fence post that the staples. Add staples to every horizontal line in the welded wire. Skip the vertical wire, the welds will give if the tension is high. Unravel fence until you run out or reach the gate post. DO NOT STAPLE TO OTHER POSTS YET
Step 8 TENSIONING WELDED WIRE FENCE:
Whether you ran out or reached the next reinforced gate post, you will need to tension the fence properly. If you lack access to the proper tool, you can fashion your own puller. What worked for me was 2 scrap 2×4’s bolted together in about 6 spots with the end of the fence sandwiched between. This spreads the tension and prevents you from just ripping the welded wire fence apart. You can then attach the 2×4’s or the professional tool to a lawnmower, truck, car, ratchet straps, etc to pull the fence and achieve tension. PLEASE BE SAFE, I AM NOT RESPONSIBLE FOR ANY DAMAGE YOU SUSTAIN IN THIS STEP TO YOURSELF OF YOUR STUFF. TENSION IN WIRE CAN BE DANGEROUS, WEAR HEAVY GLOVES, LONG SLEEVES, LONG PANTS, BOOTS, AND EYE PROTECTION. WHEN IN DOUBT ASK FOR HELP
Step 9 FASTEN FENCE:
With the fence tensioned, hammer fencing nails into all posts. Be very thorough on end posts. Use about 6 nails on all regular posts, one as close to the top and one as close to the bottom as possible. Once the welded wire has been nailed to the posts, remove the tension. Repeat Steps 7, 8 and 9 for remaining fence sections.
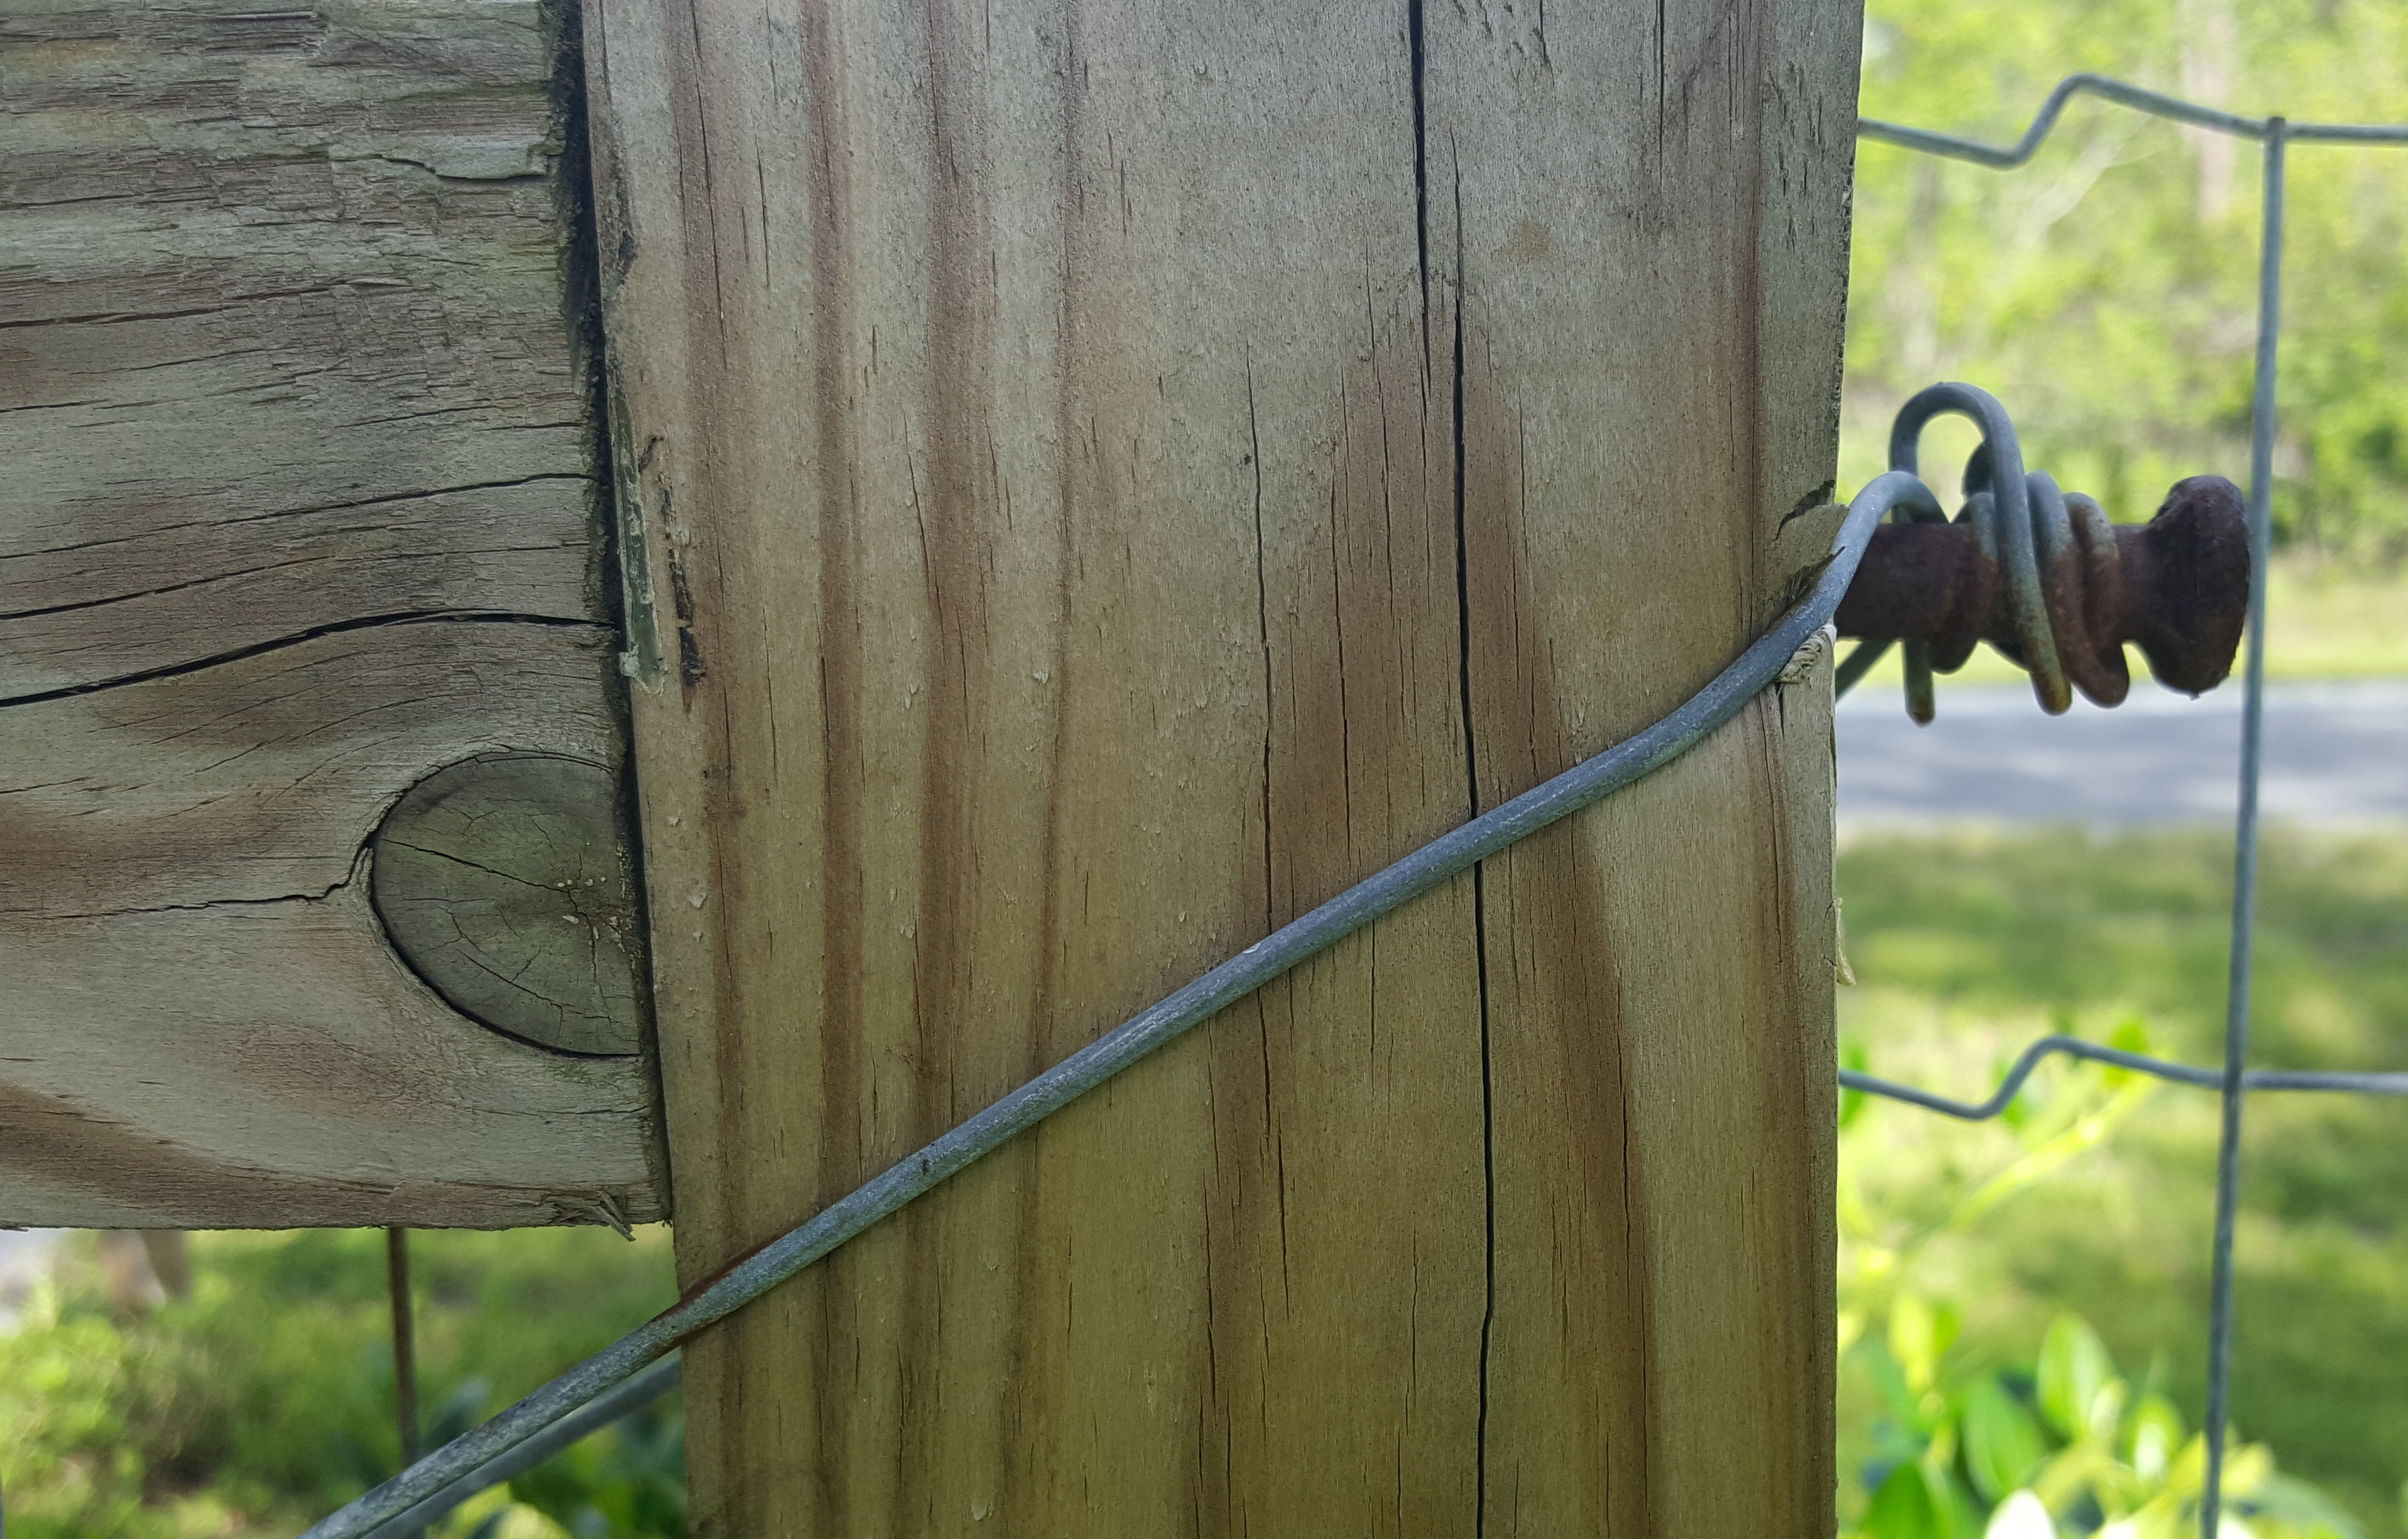
Step 10 SHRUNKEN POSTS & BRACE TENSION:
Cut the tops off your posts level with the fence material. Tension your bracing wire by inserting an extra spike between the two wires and spinning. When you can no longer hand tighten, rest the spike on the fencing material and secure with a strong wire tie. ALWAYS WEAR EYE, HAND, AND OTHER SAFETY EQUIPMENT. YOU’RE WORKING WITH TENSION WHICH COULD BE LETHAL OR PERMANENTLY DEBILITATING.
Step 11 GATE & GATE OPENER:
The gate installation is in depth, particularly if you want it to be automated.
Welded Wire Farm Fence Conclusion
You did it hopefully! Your welded wire fence will provide years of durable service. I’ve meant to write this article for years because there was so much misinformation about fence building out there. If I’ve helped you, please leave a comment saying so. Any ideas about cool stuff I can do around my house, leave a comment about that too!
Welded Wire Fence Sagging? Don’t want to remove all those staples? Check out fencing mistakes page for the fix

